Custom Speech Bubbles

Aiko’s Speech Bubbles Upgrade 1.2 can be customised with your own sprites so that you can have words styled however you wish.
Here is A video by Aiko explaining the upgrade for the CCSF 2021.
On this page I’ll share some of my own styles and tell you how you can make your own and install them.
Contents:
- Custom Speech Bubbles:
- Bubbly Style Bubble
- Crystal Style Bubble
- Halloween Style Bubble
- Interface Style Bubble
- Galactic Style Bubble
- Gold Style Bubble
- Grendly Style Bubble
- Leafy Style Bubble
- Magma Style Bubble
- Snowflakes Style Bubble
- ToxicGrunge Style Bubble
- Guide to Making Speech Bubble Styles:
- Compiling the .c16 File
- Recolouring for .s16 File Font
- Configuring the .cos File
- Installing the Speech Bubbles
Custom Speech Bubbles
Here are a series of styles I’ve made for Aiko’s Speech Bubbles Upgrade 1.2.
Bubbly Style Bubble

Instructions: Use 'bubble bubbly global' to inject globally.
Download Bubbly style 32KB, .ZIP
Crystal Style Bubble

Instructions: Use 'bubble crystal global' to inject globally.
Download Crystal style 32KB, .ZIP
Halloween Style Bubble

Instructions: Use 'bubble halloween global' to inject globally.
Download Halloween style 33KB, .ZIP
Interface Style Bubble

Styled after the Docking Station interface.
Instructions: Use 'bubble interface global' to inject globally.
Download Interface style 102KB, .ZIP
Galactic Style Bubble

Instructions: Use 'bubble galactic global' to inject globally.
Download Galactic style 23KB, .ZIP
Gold Style Bubble

Instructions: Use 'bubble gold global' to inject globally.
Download Gold style 76KB, .ZIP
Grendly Style Bubble

Instructions: Use 'bubble grendly global' to inject globally.
Download Grendly style 33KB, .ZIP
Leafy Style Bubble

Instructions: Use 'bubble leafy global' to inject globally.
Download Leafy style 120KB, .ZIP
Magma Style Bubble

Instructions: Use 'bubble magma global' to inject globally.
Download Magma style 109KB, .ZIP
Snowflakes Style Bubble

Instructions: Use 'bubble snowflakes global' to inject globally.
Download Snowflakes style 32KB, .ZIP
ToxicGrunge Style Bubble

Instructions: Use 'bubble toxicgrunge global' to inject globally.
Download Toxic grunge style 312KB, .ZIP
Guide to Making Speech Bubble Styles
This is a guide on how to make your own custom speech bubble styles for Aiko’s Speech Bubbles Upgrade 1.2 (released in CCSF 2021).
Aiko’s video explains more about them (YouTube).
I also made a spritesheet.psd with example text and the outlines and background all on their own layers to make editing the sprites easier.
Folder Organisation
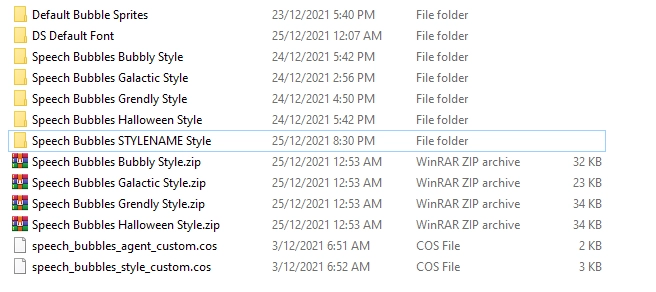
It helps to make a template folder arrangement first, to make later zipping (for sharing) and installing easier. I made a folder layout like this:
- Speech Bubbles STYLENAME Style folder
- Bootstrap folder
- 022 Speech Bubbles folder
- speech_bubbles_style_STYLENAME.cos
- Images folder
- YOU_HEX_STYLENAMECOLORNAMEchars.s16
- YOU_speech_bubbles_STYLENAME.c16
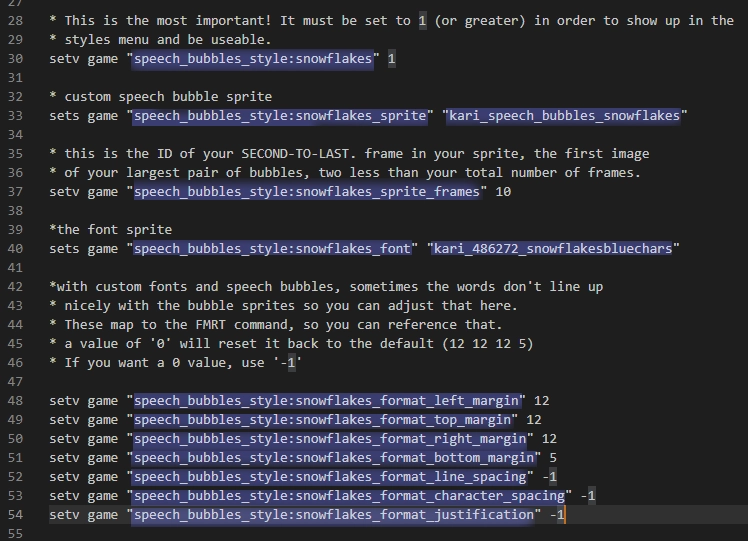
I set my .cos file up with any changes I want to make across all files so that when I make additional styles I can just replace the word STYLENAME throughout with the name of the style, and HEX with the colour of the font.
Editing the .psd File Spritesheet
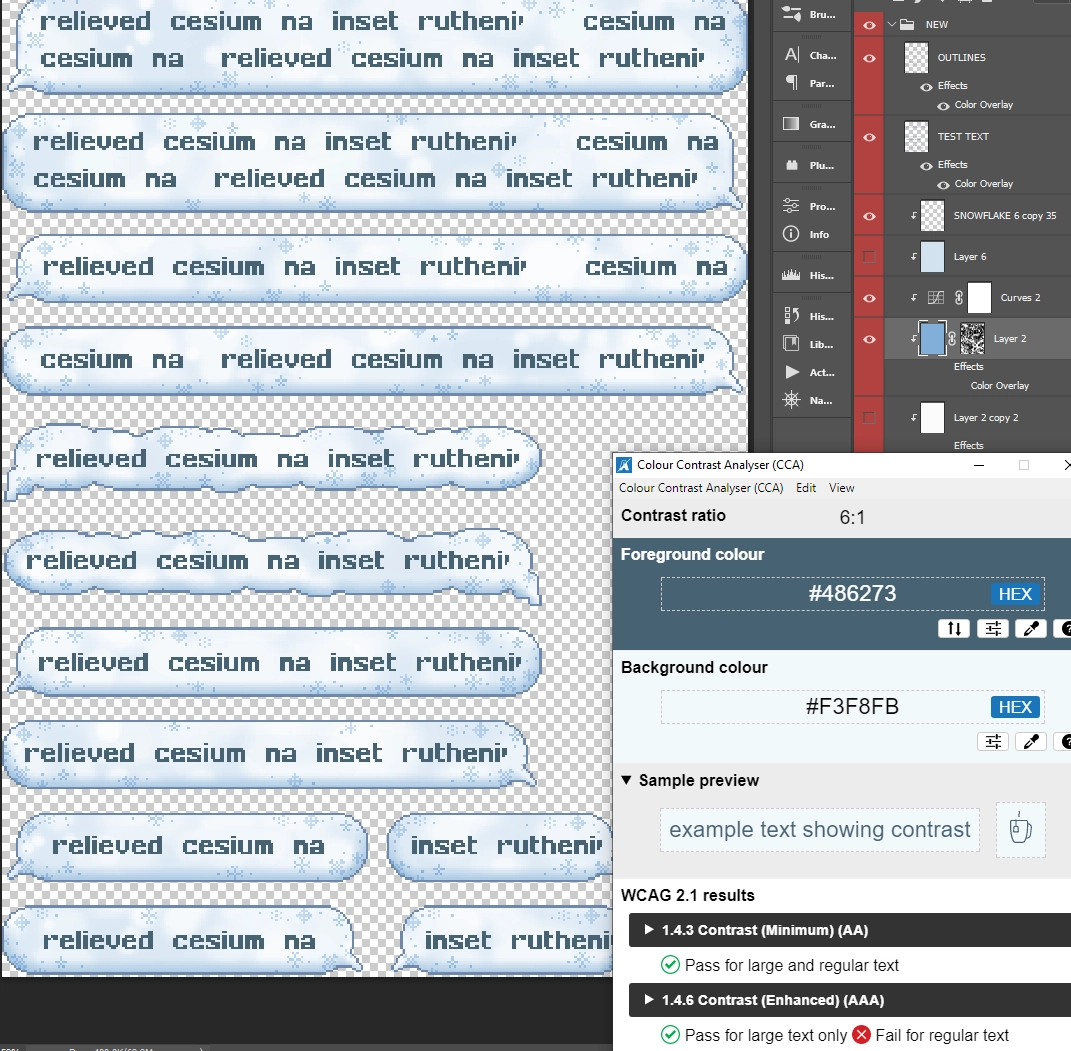
I’ve made a spritesheet.psd with outlines broken out easier for photoshop layers, and example text, and then I just hide the text layer and save for web as a .png file.
When I’m designing I’ll check my text-to-background-colour contrast with a tool called the Colour Contrast Analyser (CCA), just because it’s nice to ensure you’re being accessible, and helps you avoid having hard to read bubbles.
So in short, to create the bubble (.c16 file):
- open spritesheet.png/psd
- edit as you wish
- save out as a .png
Unpacking the .png File Spritesheet
“If you have a tool to unpack spritesheets, you can edit spritesheet.png and then unpack it again using the spritemap in sprites.json before converting it back to .c16. Leshy SpriteSheet Tool is a nice simple one if you are comfy with node! Otherwise, you can just edit the sprites the old fashioned way” - Aiko
Aiko’s video on spritesheet work.
Bmarwane Sprite Splitter Method
To do this web method:
- the web version of this particular sprite splitter is currently broken so you will need to install it from GitHub first
- select ‘Import a sprite’
- select your spritesheet.png
- select the bubbles in order (to make file names less confusing) which is thought bubbles first then smallest to largest and with left then right at each size, so:
- 234x37 tail-on-left (thought);
- 234x37 tail-on-right (thought);
- 105x32 tail-on-left;
- 105x32 tail-on-right;
- 158x32 tail-on-left;
- 158x32 tail-on-right;
- 233x32 tail-on-left;
- 233x32 tail-on-right;
- 322x32 tail-on-left;
- 322x32 tail-on-right;
- 322x43 tail-on-left;
- 322x43 tail-on-right.
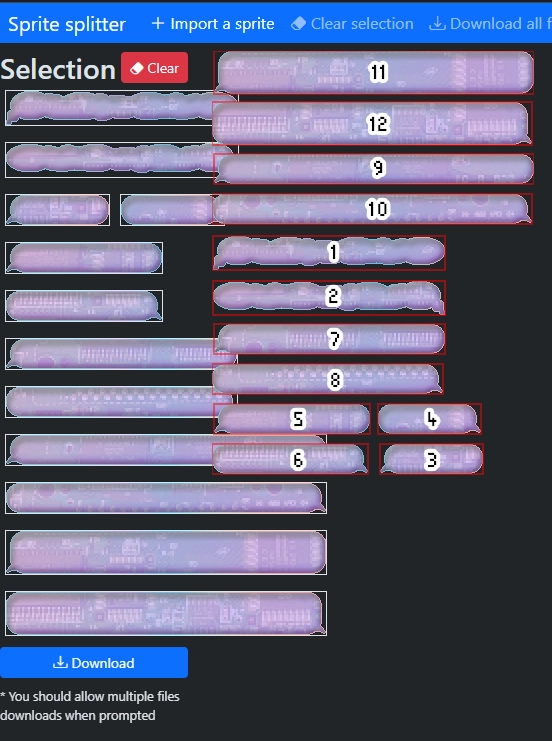
- select ‘Download’ (you may get prompted about a multiple file download the first time because it downloads as multiple files rather than a .zip)
Leshy SpriteSheet Tool Method
I’m currently (as at Nov 2024) having issues getting Leshy SpriteSheet Tool to work because of a jimp error when I run crop.js, but just in case the instructions still work for you…
If you haven’t already, there’s some initial setup:
- download Leshy SpriteSheet Tool and place it somewhere you might like to keep modding or tools
- install Git Bash (or your preferred terminal)
- open the Git Bash terminal
- navigate to the folder you have Leshy SpriteSheet Tool in by typing
cdand right click dragging the folder into Git Bash to save time and put in the file path automatically. It should show up as something similar tocd ‘d/Modding Tools/Creatures/Leshy Spritesheet Tool’ - the following two npm steps only need to be done the first time you use this tool to initialise it:
- type
npm init - enter a few times to go through the utility until it gets to ‘Is this OK? (yes)’
- type
npm install jimp
- type

If you don’t already have a sprites.json with the correct sizing for the bubbles to crop to:
- go to https://www.leshylabs.com/apps/sstool/
- drag your packed spritesheet into editor window
- use automatic chunks recognition by Remap button
- download final repacked spritesheet and put it to crop script folder. Rename it to spritesheet.png
- select JSON config format for the sprite map.
- select Save button and download final sprites.json config.
- put it in your crop script folder and rename to sprites.json if needed.
If you have already done those initial setup steps before:
- open the Git Bash terminal (or your preferred terminal)
- navigate to the folder you have the tool in by typing
cdand right click dragging the folder into Git Bash to save time and put in the file path automatically. It should show up as something similar tocd ‘d/Modding Tools/Creatures/Leshy Spritesheet Tool’
Now:
- overwrite the spritesheet.png in the Spritesheet Cropper folder with your updated bubble
- type:
node ./crop.js - this will fill the /out folder with the cropped .png files

Compiling the .c16 File
Alright, now that you have your individually cropped files you’re going to stick them all together again!
Steps:
- open Edos
- drag the cropped bubbles-#.png files into Edos, one by one in numerical order because if you drag them all in at once it messes up the order. If you want to just drag them all in at once, then rearrange them in Edos and ensure the order of the bubbles is thought and then smallest to largest and with left then right at each size, so:
- 234x37 tail-on-left (thought);
- 234x37 tail-on-right (thought);
- 105x32 tail-on-left;
- 105x32 tail-on-right;
- 158x32 tail-on-left;
- 158x32 tail-on-right;
- 233x32 tail-on-left;
- 233x32 tail-on-right;
- 322x32 tail-on-left;
- 322x32 tail-on-right;
- 322x43 tail-on-left;
- 322x43 tail-on-right.
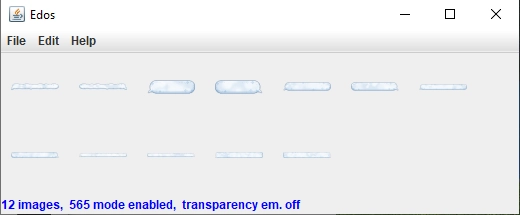
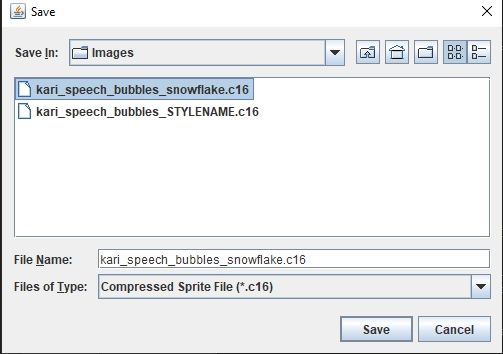
- file > save this as a .c16 file (I name mine like ‘YOU_speech_bubbles_STYLENAME.c16’, so ‘kari_speech_bubbles_galactic.c16’)
Recolouring for .s16 File Font
For your font (.s16 file), first ensure you have installed ImageMagick and Java.
I already had Java installed and installed ‘ImageMagick-7.1.0-19-Q16-HDRI-x64-dll.exe’ with legacy options ticked in the setup, I had to run the setup as an administrator to avoid an error about not having SP1 (wasn’t sure if that was important, but just in case anyone has issues).
Steps:
- Using your preferred terminal, navigate to the folder you have the DS Default Font in with
cd 'LOCATION/DS Default Font’ - run the COLOR CHANGE.bsh script with
'LOCATION/DS Default Font/COLOR CHANGE.bsh’ ‘\#HEXCOLOR’ - you’ll know you’ve typed it correctly when the terminal follows up with a #HEXCOLOR, and then Edos will open with the recoloured font all neatly there for you.
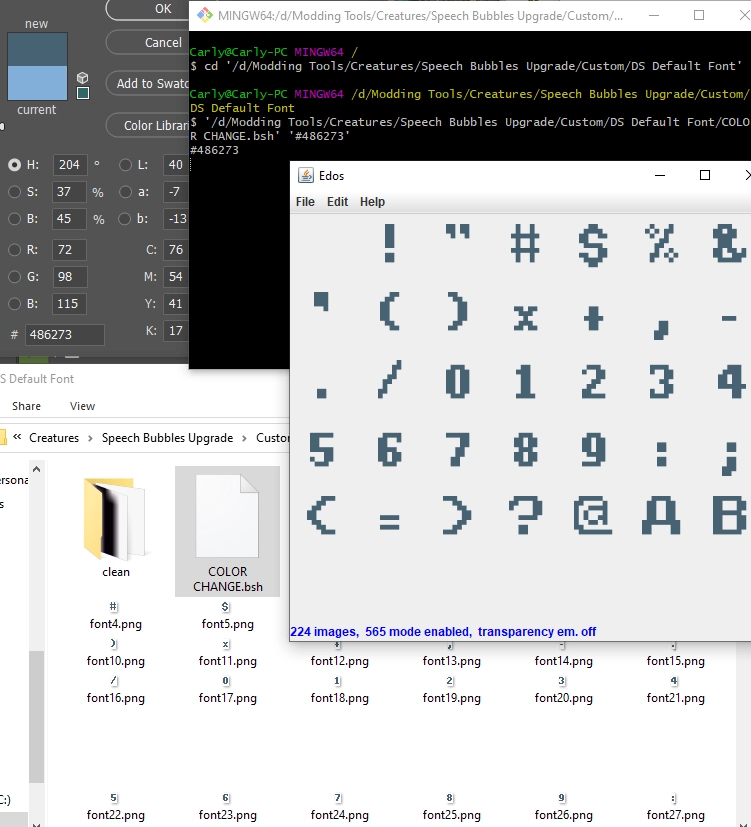
- File > Save this as a .s16 file, I name mine like ‘YOU_HEX_STYLENAMEchars.s16’, so ‘kari_8f8fca_galacticpurplechars.s16’ for example.
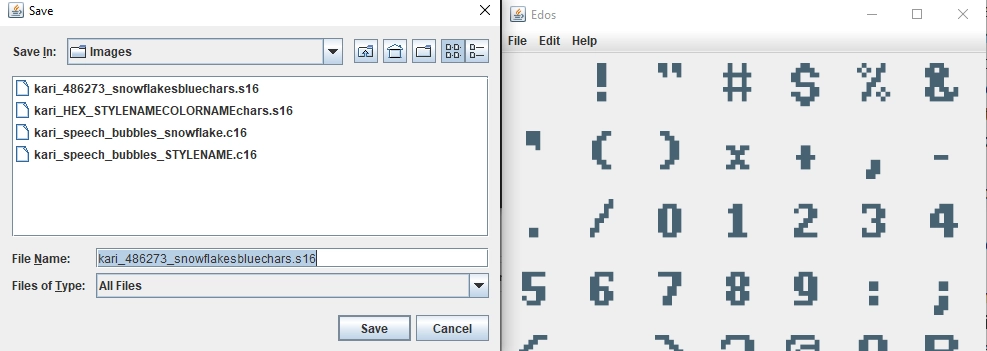
- If you’re not making any more styles, you can now close out of your terminal and move onto the .cos file editing!
Some existing colours I’ve already made in case it saves you some editing:
- kari_2f638b_bubblybluechars.s16
- kari_8ee567_grendlylimechars.s16
- kari_8f8fca_galacticpurplechars.s16
- kari_833b03_goldbrownchars.s16
- kari_486273_snowflakesbluechars.s16
- kari_c0e09b_leafygreenchars.s16
- kari_FF8D3B_magmaredchars.s16
- kari_ffb055_halloweenorangechars.s16
- kari_eaff00_neonyellowchars.s16
There is a default black and white:
- BlackOnTransparentChars.s16
- WhiteOnTransparentChars.s16
Configuring the .cos File
Steps:
- open the .cos file in your favourite code editor (Notepad, Notepad+, Visual Studio Code, etc).
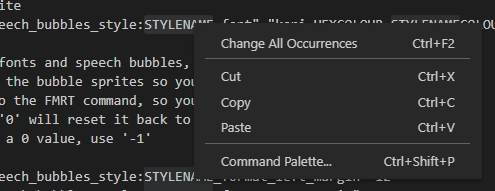
- replace STYLENAME throughout with your style name, and check all file name mentions match your files.
Installing the Speech Bubbles
Make sure you first have Aiko’s Speech Bubbles Upgrade 1.2 and Aiko’s Magic Words Core installed.
If you set up your folders correctly, you should be able to zip up your style at this point to share wherever!
Test as follows:
- if set up correctly you should be able to just copy in and file merge into the right location. Copy the .cos, .s16 and .c16 into your relevant folders:
- Bootstrap
- 022 Speech Bubbles
- speech_bubbles_style_STYLENAME.cos
- Images
- YOU_HEX_STYLENAMECOLORNAMEchars.s16
- YOU_speech_bubbles_STYLENAME.c16
- start a new world to have it load the .cos.
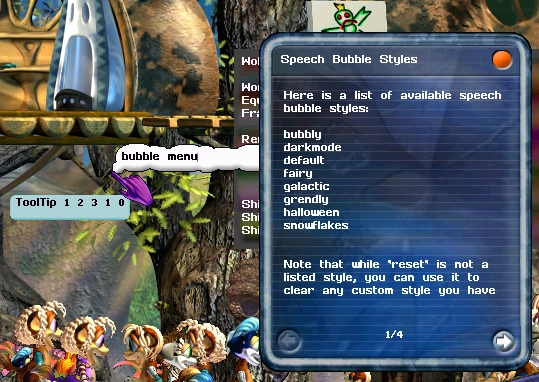
- type ‘bubble menu’ to check that your bubble style shows up in the list (as talking not as CAOS), and ‘bubble STYLENAME global’ to see how it looks on all creatures (or whichever bubble command you’d like to use to test).
Enjoy making custom bubbles!
